
A Day in the Life.

To set up for a client photo/videoshoot, first I plan ahead, using software on my computer, and communicating with the client. This is a very crucial step, as I lay out what is expected of me and the client, and how we will go about planning how to to the shoot. For this particular shoot, I was tasked with creating questions and recording an interview for the client, as well as many product shots and Breel of the entire process of creating the product, start to finish.

The second step is to go to the store, picking up props and different materials to complete the shoot. This time, I was searching for elements to put in the foreground, and some background elements. These are helpful to set a tone for the product, to sell the video or photos a bit more. I picked up some Bristol board to act as the backdrop, with a white piece to act as a bounce board, reflecting light. I had checked with the client on some extra props that he had lying around that we were able to use for the shoot.

The third step in this process is to actually go to the location. I frequently travel for my work, so I hopped in my car, made sure all my batteries and camera gear were charged, and I was o my way. This time I was going to Saint John, so I had to gas up and figure out a good radio station to listen to, as well as one that wouldn’t lull me to sleep, as I left at 7 am. For me, this is also a crucial point in the shooting process, as I can think about what I want to shoot, how to go about it, and creative ideas as I get to the shoot location.

As I get to the shoot location, I take some time to set up my gear, making sure to get everything I need ready as to not waste time. This work called for a one-light setup, with black Bristol board making up the bottom and back of the setting, with the aforementioned white Bristol being a bounce sheet. Getting the light position right to capture the right feel in a product is critical to nailing the shoot.

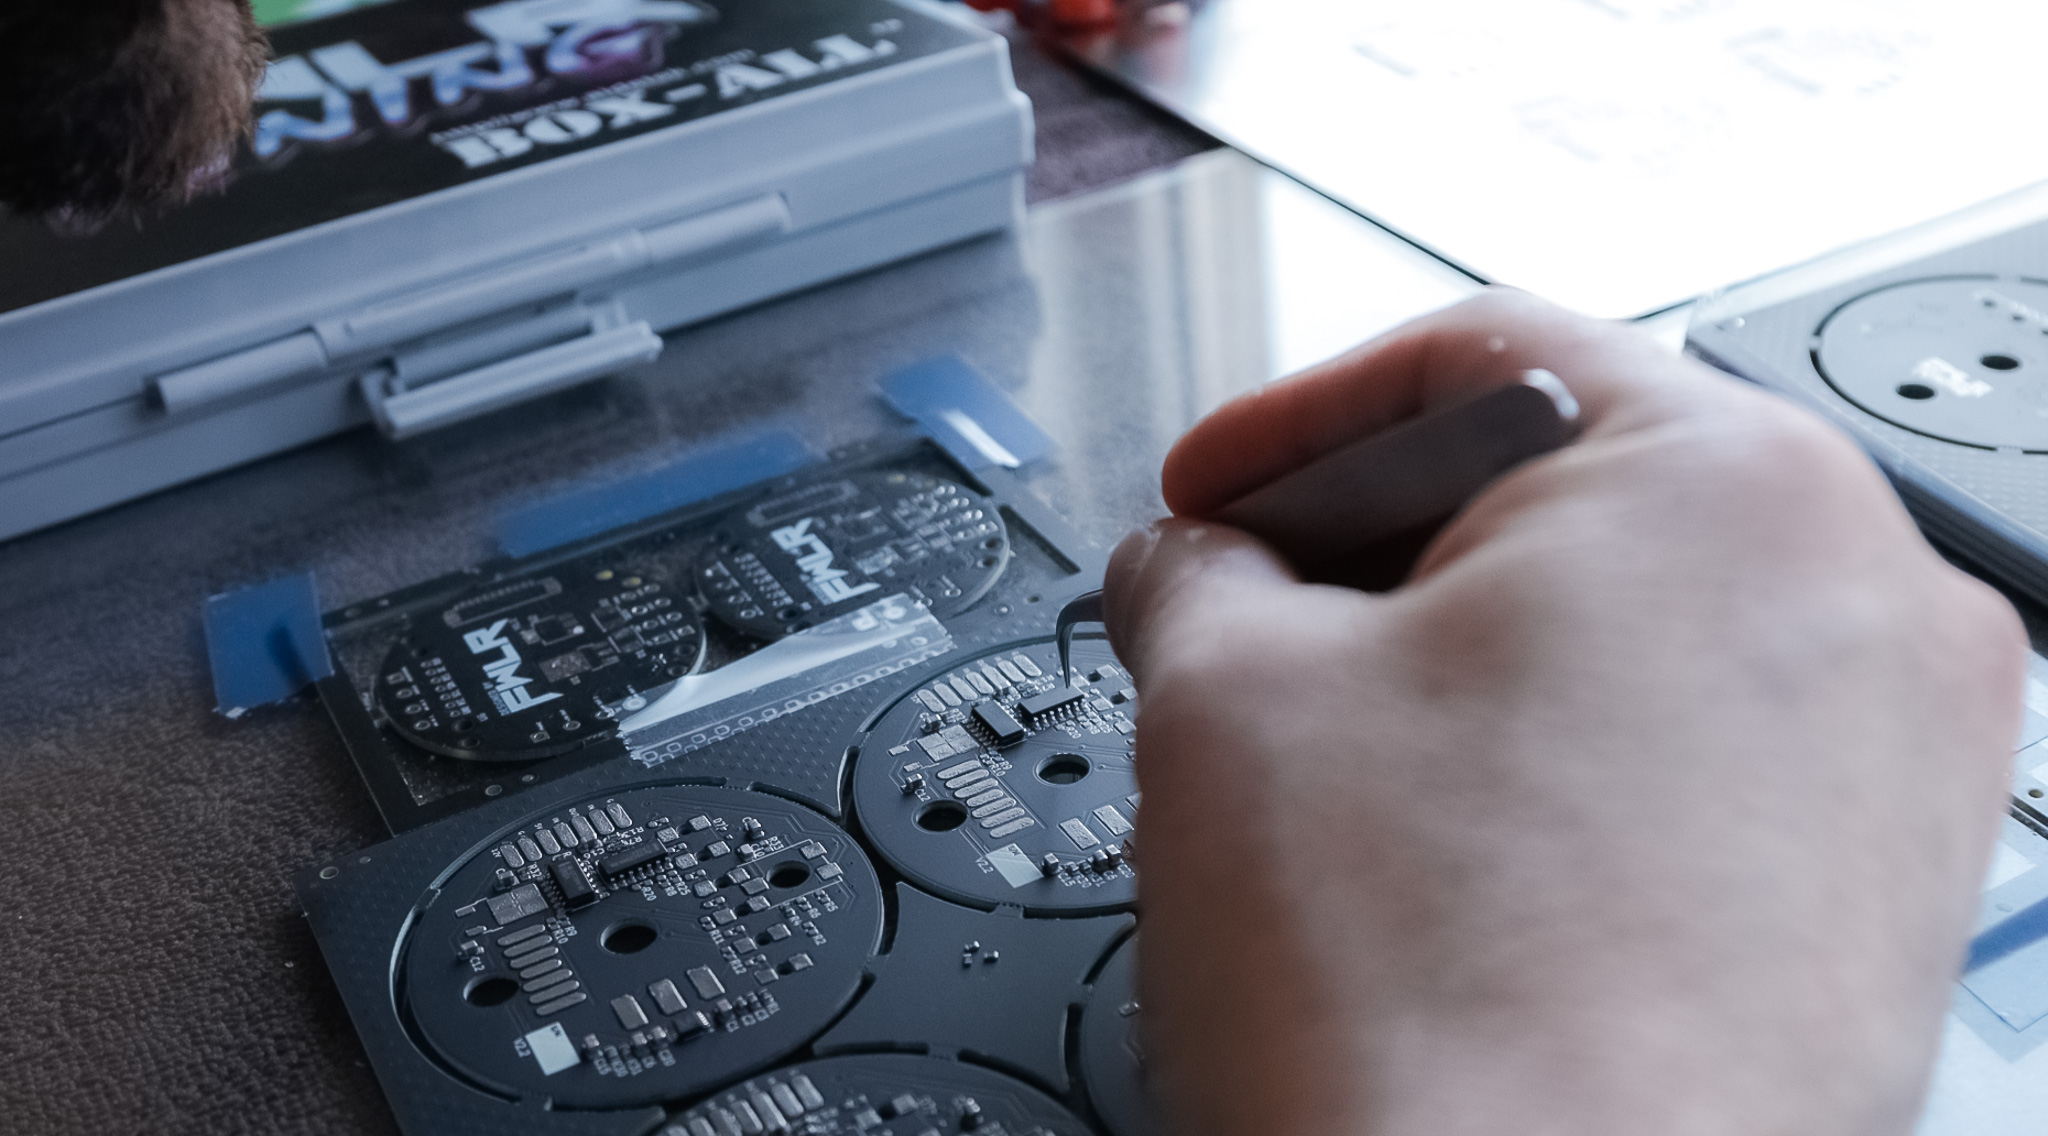
After getting the product shots all done, we can move onto the detail shots of FWLR putting the small electrical components into the PCB board. This is the third step in the process, but one of the only ones we can film that has action. The first two steps involve designing the PCB board on the computer, and then sending it to a site that manufactures them. This third step, assembling the product, is our first look at the product as it finally comes together.

FWLR ( Nick Fowler) works to put together many pieces into this PCB board, with many different components each tackling a different piece of the puzzle. This product that he is working on is a knock detective, built for tuner enthusiasts who want to put more power into their vehicles. This technology, until this product, was never able to fit into a standard gauge cluster, nor stay with a car. Nick Fowler with his company FWLRtuning, aims to rectify this problem.

One of the last steps in this process is to bake the board, in order to set all the pieces in place. You can do this many different ways, but FWLR enjoys the simplicity of a toaster oven, as it is a cost-effective, and space-efficient way to get the final steps of assembling the internals.

At last, we have a final product. From the start of planning to arrive on the film set to the edited photos and videos, creative processes like this are taxing. However, as more and more people rely on the Internet to shop, communicate with peers, and understand the world around them, it is useful to be able to create that space and help to carve out a place on the Internet for yourself.